A Toddler's Guide to Vibe Coding Your First Website
Non-developer's complete guide to building a website using AI.
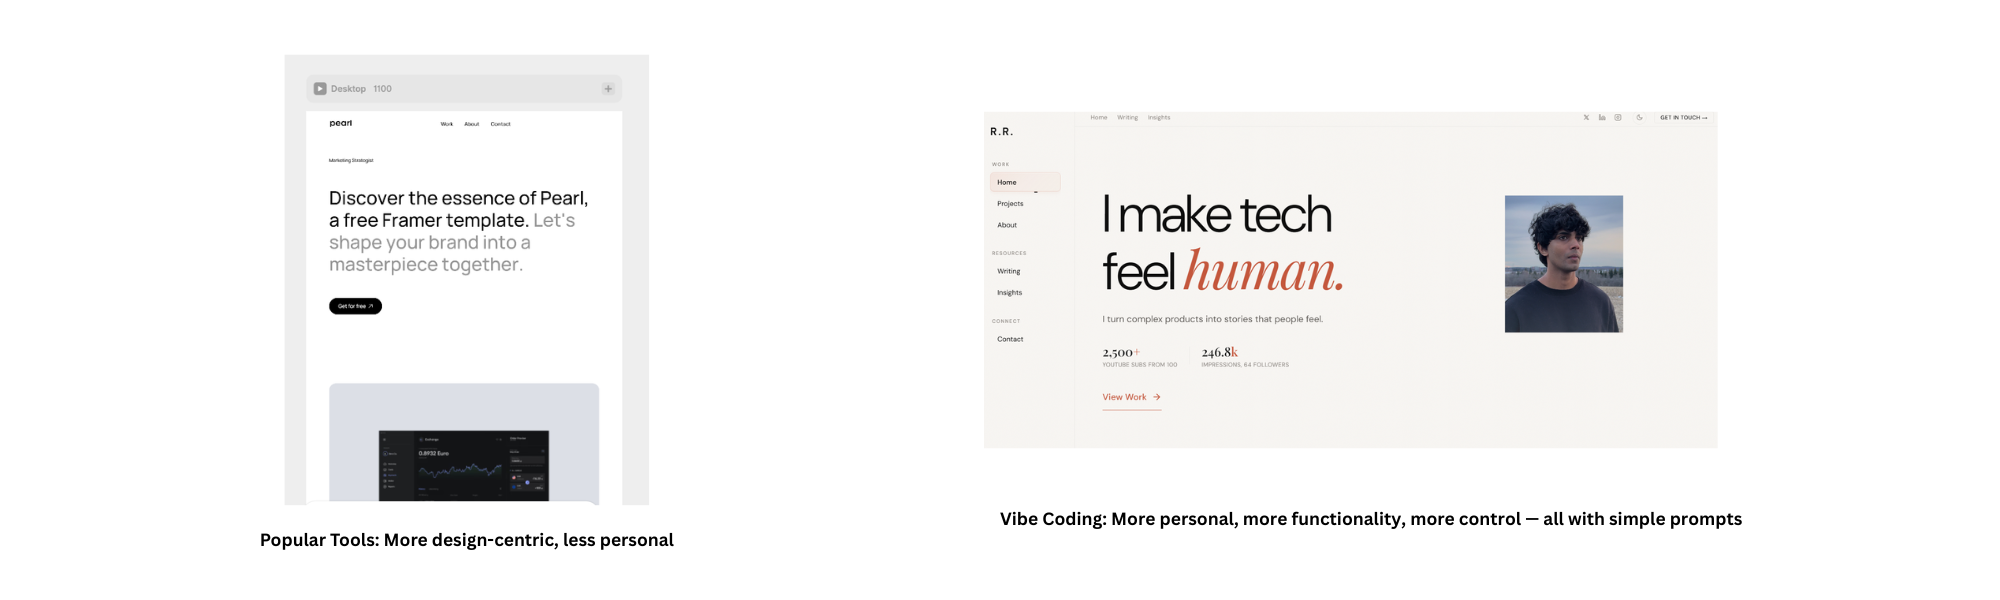
I've created websites using popular tools online. They look good until you want to change something. Want a new button? A new section? A different page layout? Now you need to really, really know the tool. And then there's making it work on every screen. Desktop, mobile, tablet — three separate layouts. That alone will take away your time to touch grass.
This Is Where Vibe Coding Changes Everything
Instead of dragging layers around and fighting a template's limitations, you describe what you want. Like you're talking to a normal person.
"Add a contact section at the bottom."
"Make the header sticky."
"Change the font to something editorial."
Done. And your site automatically works across all devices. No separate layouts, no resizing, no testing on three different screens.
The Catch: You Still Need Taste
The catch? You still need taste. AI can build what you describe, but it can't decide what's worth building. You need a point of view. A sense of what looks good, what feels right, what matches your brand. That's the human part. AI handles the construction. You handle the direction.
What You Need to Start
Finding Your Design Style
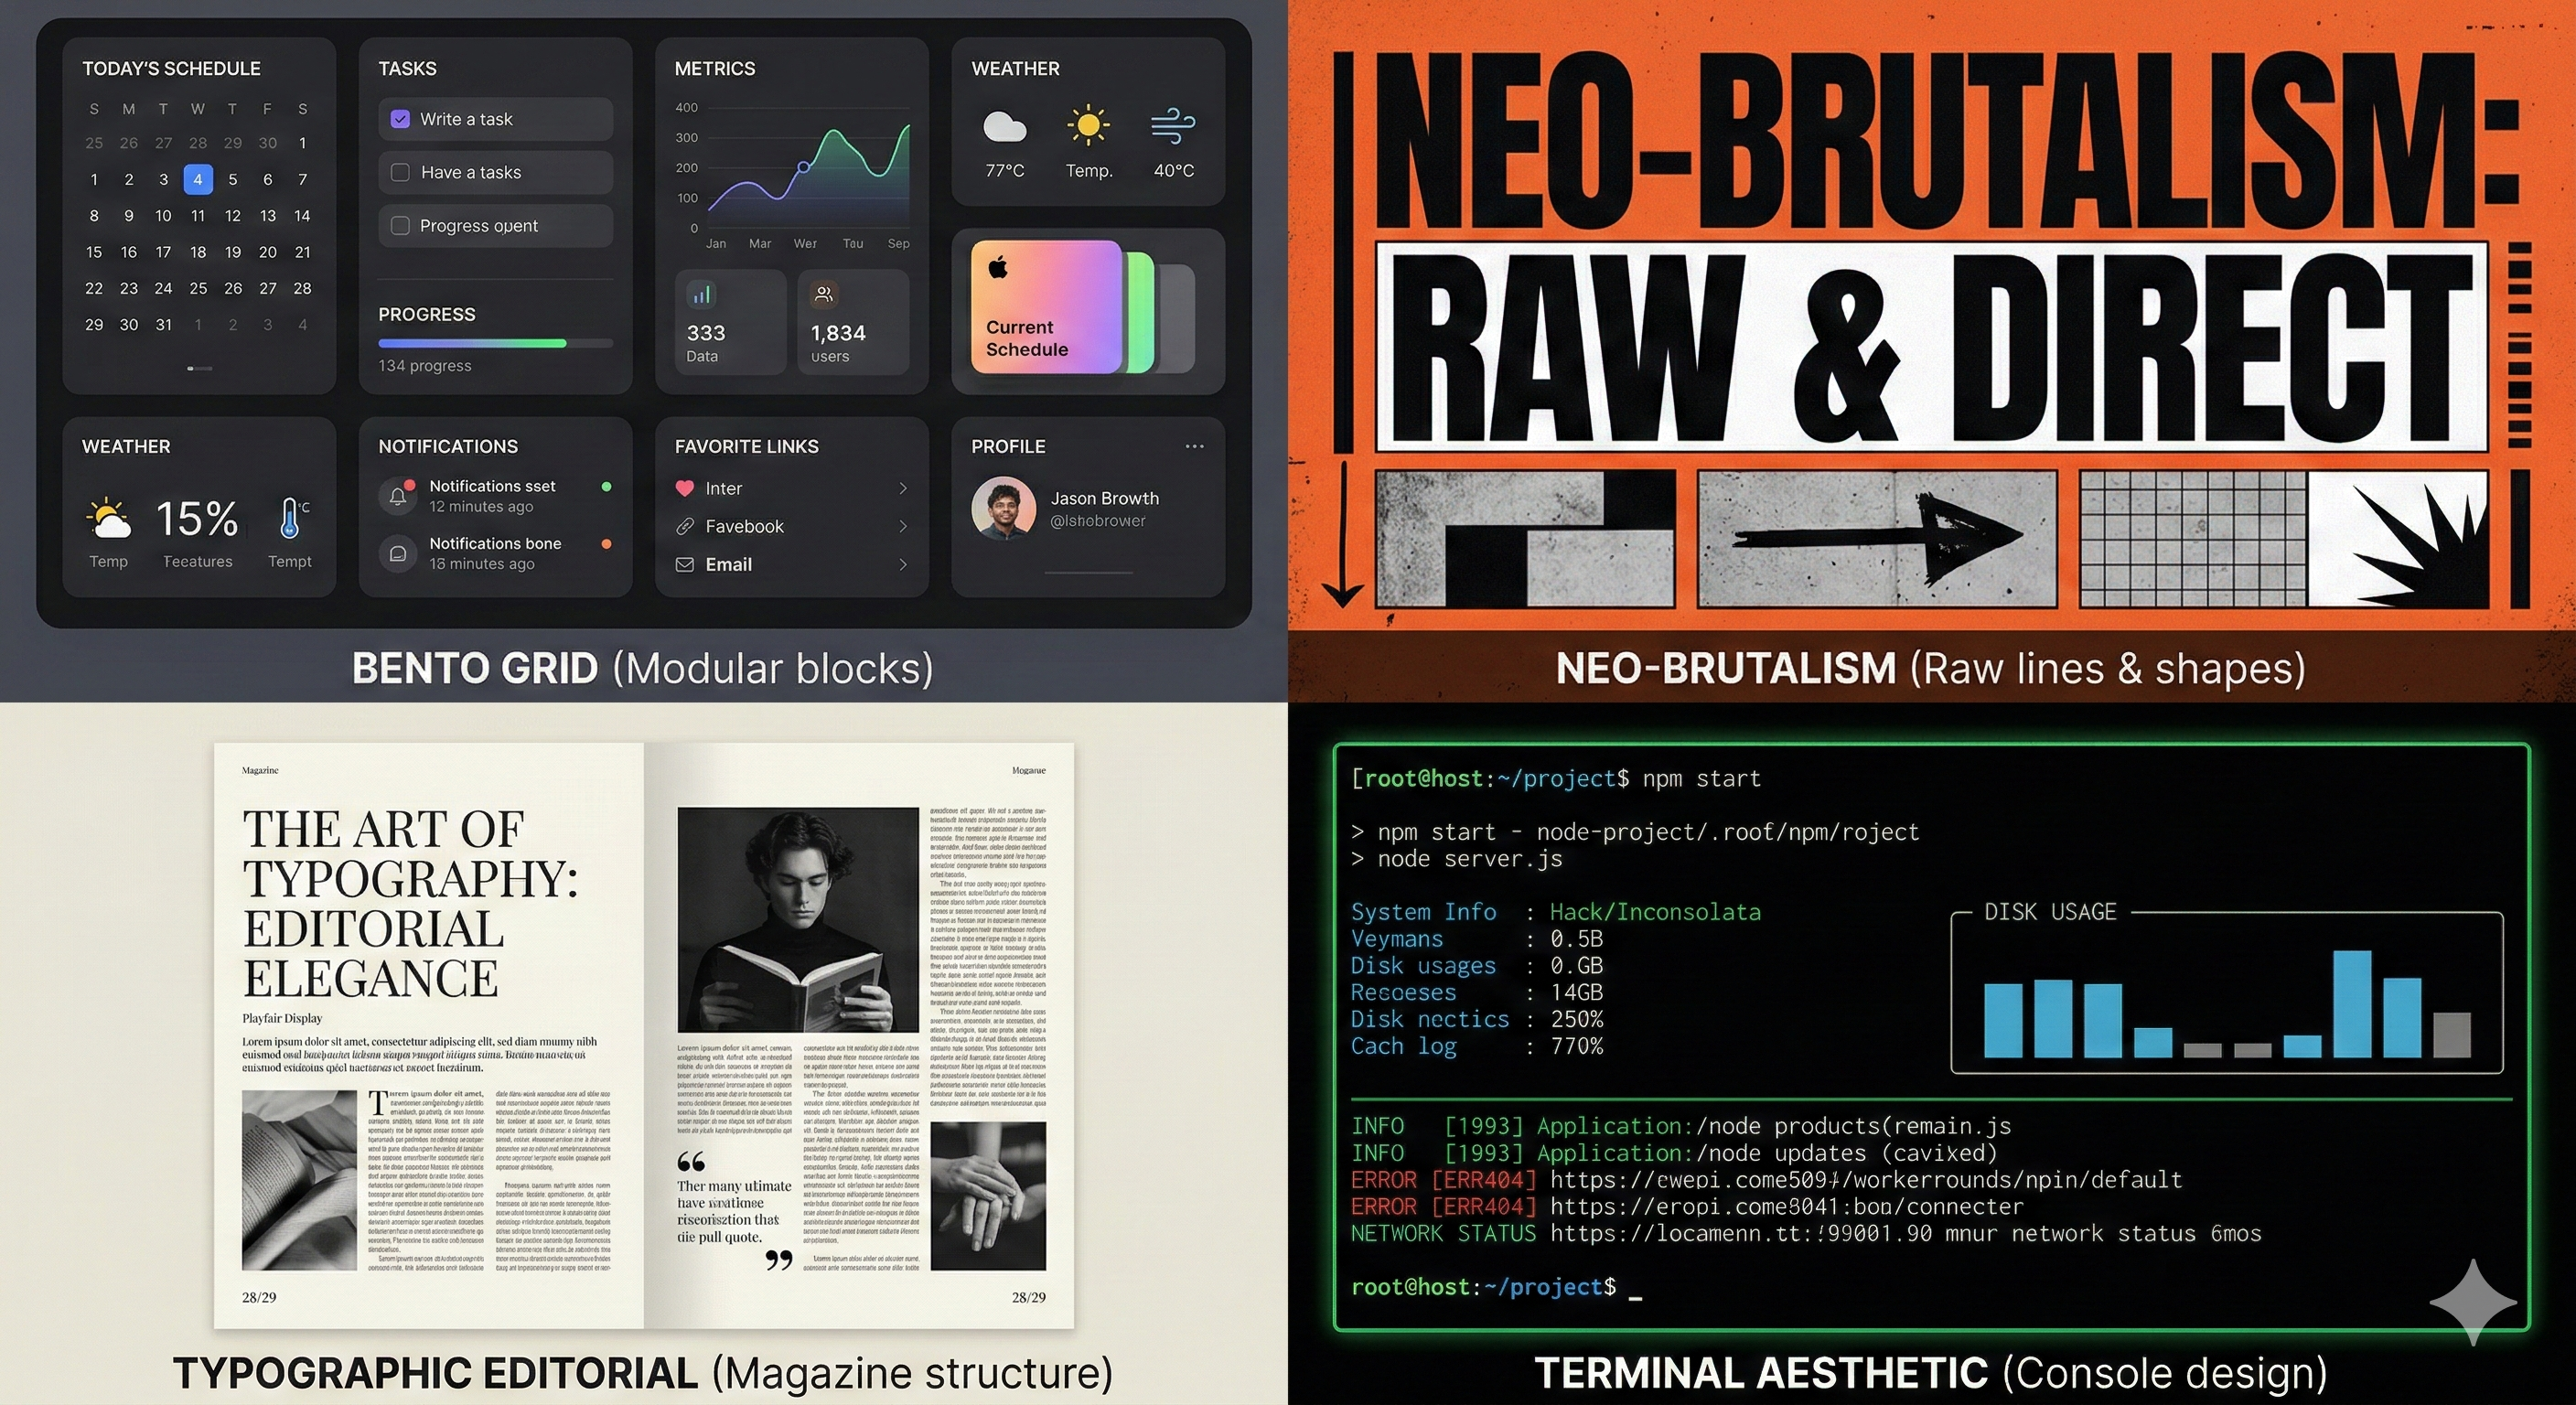
Not every design style works well when you're building with AI. Here are four that do.
The Bento Grid is modular blocks arranged like a dashboard. Neo-Brutalism is hard lines and solid colors with intentional rawness. Typographic Editorial is clean type hierarchy with magazine-like layouts. The Terminal aesthetic is console-style design with monospace fonts and dark backgrounds.
I went with Typographic Editorial, but not straight out of a template. I pulled design inspiration from Cosmos and mixed two directions: strategy-leaning UX for structure and editorial-leaning design for personality.
The combination speaks to what I do — creative strategy with execution. I already had my colors in mind. But I let Claude choose the fonts and build the visual system.
Building Your Design System
Before you touch Claude Code, open Claude and build your design system first. Find two websites whose design you admire. Tell Claude to analyze them and create a design system that borrows the best elements from both — the layout, the typography, the spacing, the color philosophy.
This becomes your blueprint. When you move to Claude Code, you're not starting from scratch. You're handing Claude a clear direction.
Building with Claude Code
Open Claude Code and paste your design system. Tell it to build your website structure. Claude will create the files in a folder on your desktop. Then paste the preview URL into Chrome to see the design.
Don't like something? Tell Claude to change it. This is the loop. Describe, preview, refine, repeat.
Once the layout feels right, layer in the details.
"Add a dark mode and light mode toggle button to the header."
"Add social media icons in the footer. Here are my links."
"Add Google Analytics to my website. Here is my tracking code."
All of it is as simple as typing a sentence.
Keep going until you can click through every page and nothing feels off. When you get there, your website is done. It's sitting in that folder on your desktop, fully built.
Going Live
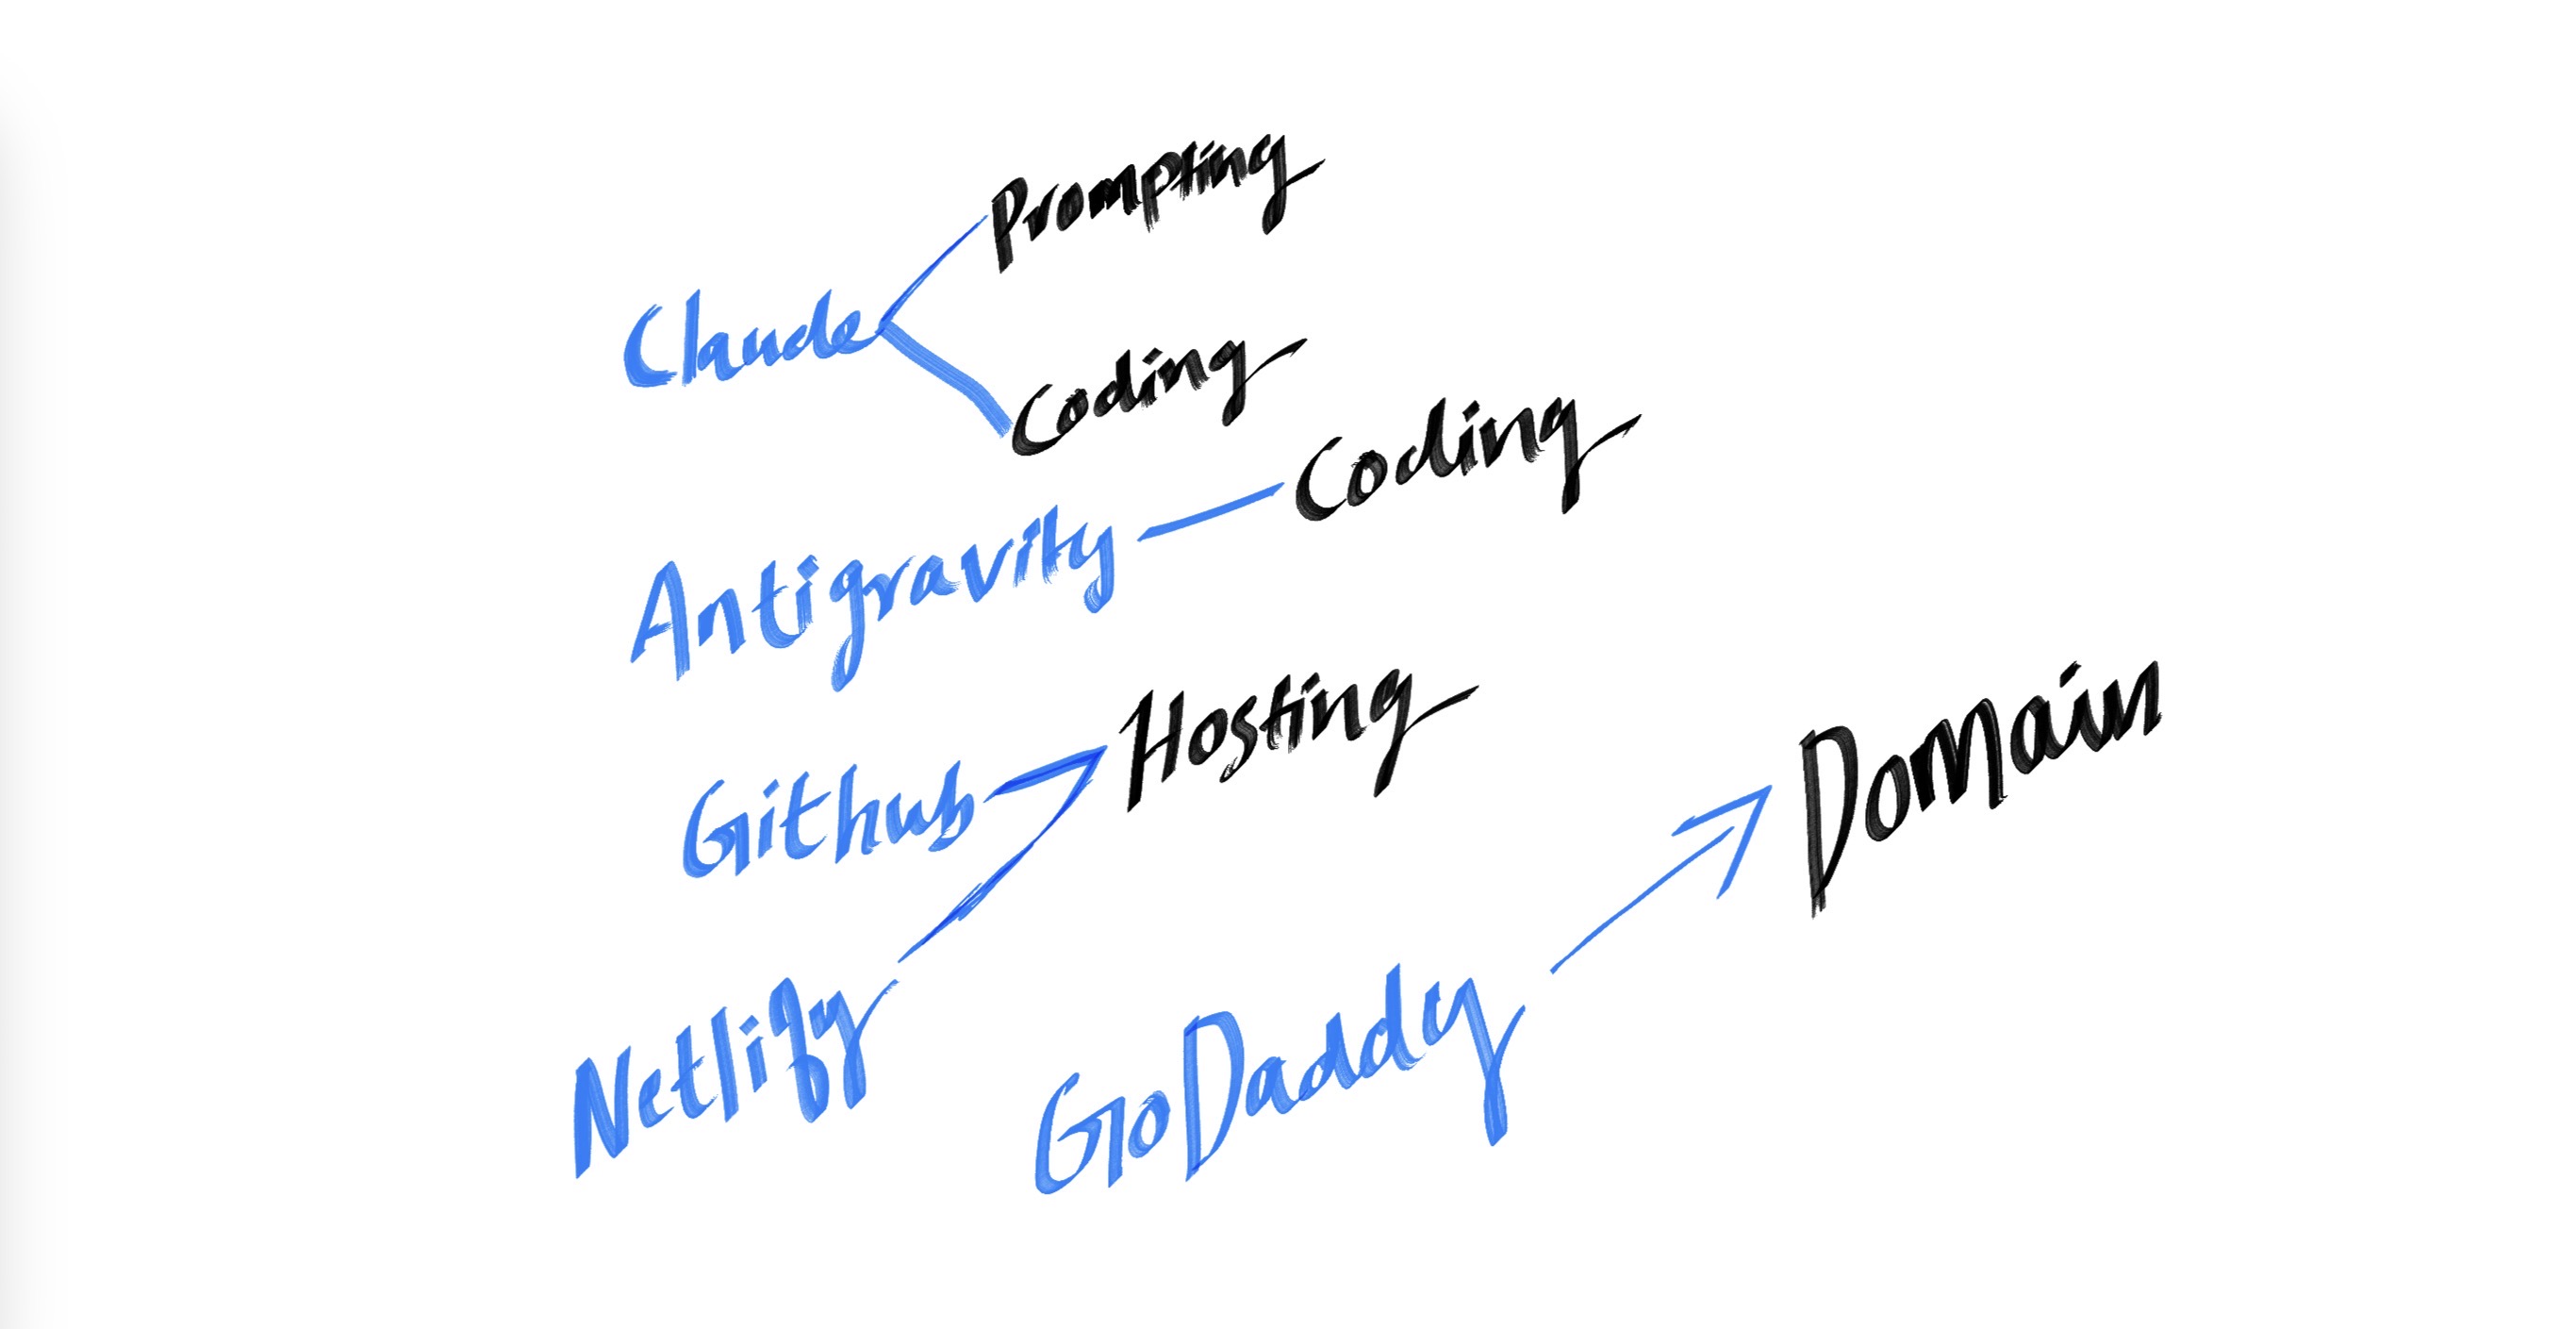
Download the Claude browser extension. This is your agent for the boring setup stuff.
First, push your files to GitHub:
"Push all my portfolio files to GitHub. Create a new repository called my-portfolio."
Go to Netlify and connect it to your GitHub repository. Now open the Claude browser extension and use this prompt:
"I just deployed my portfolio website on Netlify and I bought a domain on GoDaddy. Go to my Netlify dashboard, find the DNS records I need to connect my custom domain. Then go to my GoDaddy domain settings and paste those DNS records in the right fields. Walk me through each step before you do it."
The browser agent handles the back and forth between Netlify and GoDaddy for you. No copying random strings between tabs, no Googling "how to set up DNS records."
Your website is now live.